Floating shelves have become one of the most popular home improvement projects for homeowners looking to add practical storage and contemporary style. Whether you’re updating a living room, home office, bedroom, or kitchen, a well-built floating shelf can transform an empty wall into an attractive feature.
Why Floating Shelves Are a Great DIY Project
Unlike bulky shelving units, floating shelves create a clean and minimalist appearance. They work well in both modern and traditional homes and can be customised to suit your décor.
For beginners, this project is ideal because it requires only basic tools and materials. Most homeowners can complete the build in a single weekend, making it an affordable way to improve a room without undertaking major renovations.
Materials and Tools You’ll Need
Before you begin, gather the following items:
- Timber board of your chosen length
- Floating shelf brackets
- Wall plugs and screws
- Spirit level
- Drill
- Sandpaper
- Paint, stain, or wood oil
- Tape measure
- Pencil
Choosing quality timber is important. Solid pine and oak are popular options because they are durable and easy to work with.
Measuring and Planning the Installation
Careful planning is essential for professional-looking results. Measure the wall space and determine the ideal shelf position.
Think about what the shelf will hold. Decorative items such as plants and photo frames require less support than books or kitchenware. The intended use will influence the type of brackets you choose.
Mark the wall lightly with a pencil and use a spirit level to ensure your guide marks are straight.
Preparing the Shelf
Sand the timber thoroughly to remove rough edges and create a smooth surface. Once prepared, apply your chosen finish.
Natural wood oils enhance the grain and create a warm appearance, while painted shelves can match existing décor schemes. Allow sufficient drying time before installation.
This stage is often overlooked, but proper finishing helps protect the timber from wear and moisture.
Installing the Brackets
Locate wall studs where possible for maximum strength. If studs are unavailable, use suitable wall plugs designed for your wall type.
Secure the brackets according to the manufacturer’s instructions and double-check alignment using a spirit level. Even slight inaccuracies can become noticeable once the shelf is installed.
Take your time during this stage, as the stability of the finished shelf depends on correct bracket installation.
Mounting the Shelf
Once the brackets are secure, slide or attach the shelf according to the bracket system.
Check that the shelf sits evenly and remains level across its entire length. Tighten any fixing screws and gently test the shelf before placing items on it.
Avoid overloading the shelf immediately. Give yourself time to confirm that all fixings are secure.
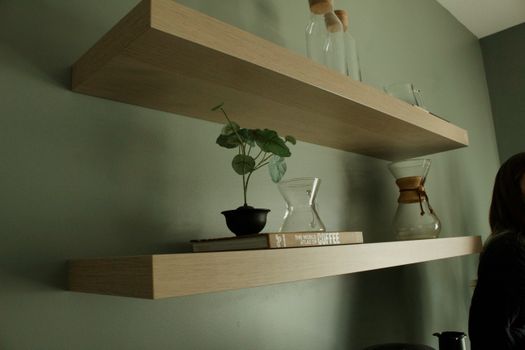
Styling Your New Floating Shelf
The fun begins once installation is complete. Floating shelves provide endless styling opportunities.
Consider combining framed artwork, houseplants, candles, books, and decorative objects. Group items in varying heights to create visual interest.
In kitchens, floating shelves can display attractive crockery and glassware. In home offices, they provide valuable storage while maintaining a tidy workspace.
Benefits Beyond Storage
A floating shelf offers more than additional storage space. It can create a focal point, improve room organisation, and add personality to your home.
Because the project is relatively inexpensive, it’s an excellent way to update interiors without a significant investment. Many homeowners discover that once they’ve completed one shelf, they quickly begin planning additional installations throughout the house.
With careful preparation and attention to detail, a DIY floating shelf can deliver professional-looking results while giving you the satisfaction of completing a home improvement project yourself.
Featured image credit: Avery Arwood for Pexels.